Go Drive Test !!!
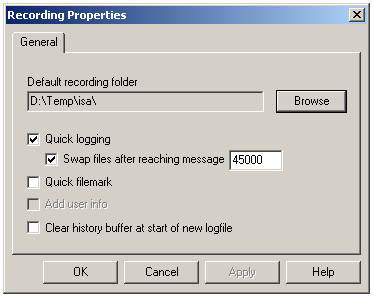
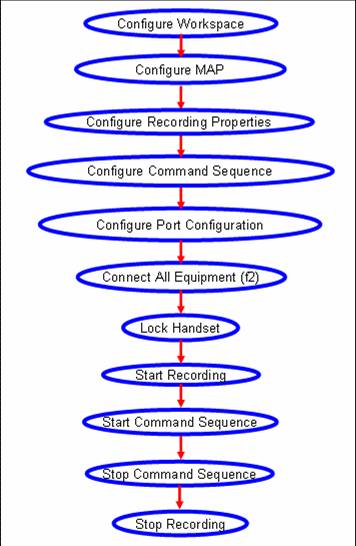
1. Configure Recording Properties : Menu Tab Logfile -> Recording Properties
2. Select recording folder : Click Browse -> Select Directory
3. Select Quick logging and setup size of swap file “after reaching message “
4. Use 2G or 3G configured workspace (with spacific map : road, route, cell file)
5. Make sure all equipments configured to the right port
6. Connect all 
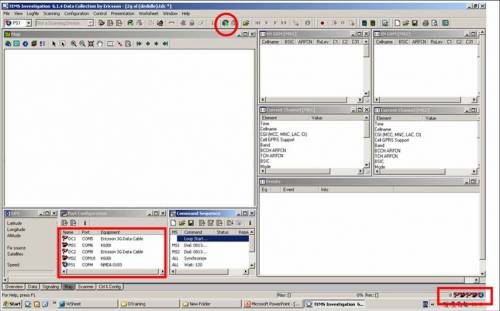
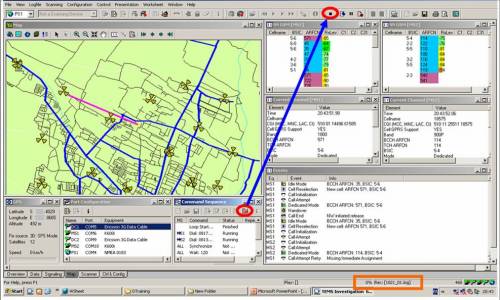
7. After all equipments connected (symbol green), window gps, serving neighbour gsm, current channel and events will be full filled
8. Don’t forget to lock TEMS Handset into GSM only or 3G only.
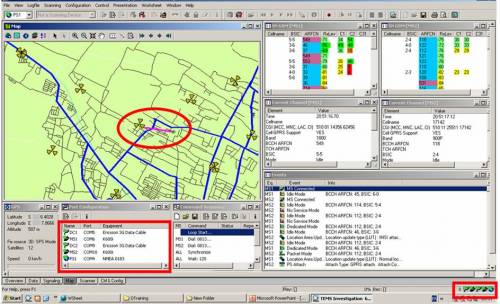
9. To start drive test, click record then start command sequence
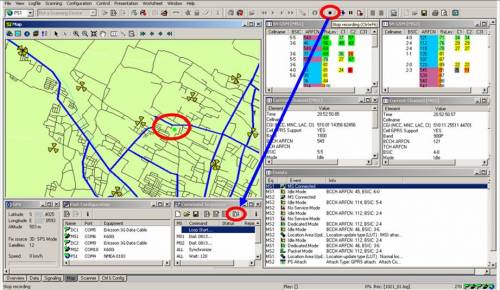
10. After all route complete, wait untill call end then stop command sequence and stop recording.
Here the flow step by step Go Drive Test !!!
Sumber : orinaica-wordpress
Back to Drive Test Menu