| Terrain Data & Obstruction Entry and Finding Suitable Antenna Heights
This Terrain Data should be got from accurate Contour Map or from Actual Path Survey. Actual Obstruction Location, Height & Type should be get from Path Survey
How to enter Terrain Data & Obstruction?
2.3.1- Go to Terrain Data Page from Module Menu. Or by Pressing ctrl T
2.3.2- Enter you Terrain data according to Map Scale as shown in Fig. 2.3.2
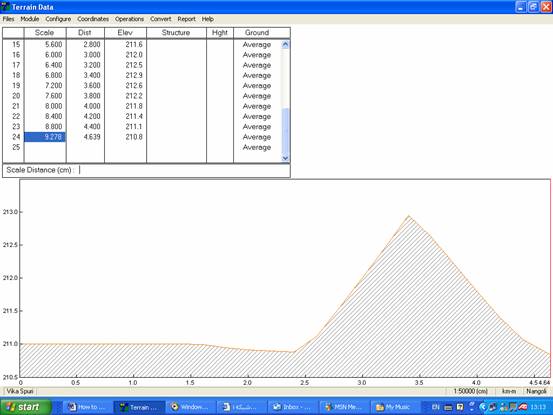
Map Scale
Fig. 2.3.2
2.3.3- Enter Obstructers by clicking on Structure position. Then choose structure type (Tree, Building or Water Tower). Enter this structure height in meters as per shown in Fig. 2.3.3
2.3.4- Repeat the above for the other obstacles
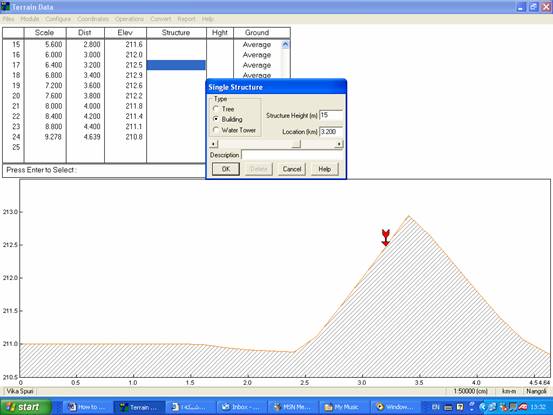
Fig. 2.3.3
After we entered Terrain Data & Obstacles Heights we have to find the suitable Antenna heights in each sites to grantee clear Line Of Sight (LOS) as the following steps
2.4.1- Go to Antenna Height page from Modules menu or by pressing ctrl A as shown in Fig. 2.4.1
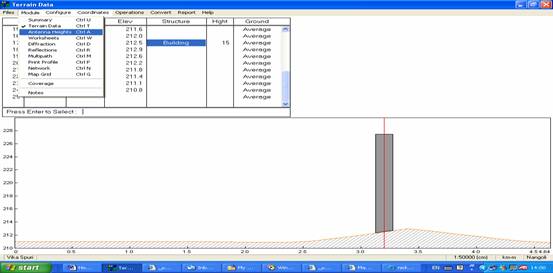
Fig. 2.4.1
2.4.2- In Antenna Height page click on Optimize to get optimize antenna height for reference only as shown in Fig. 2.4.2
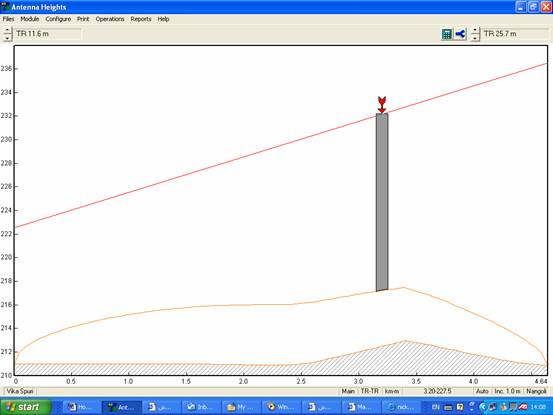
Fig. 2.4.2
2.4.3- The above Antenna is only for reference while the final antenna height will be decided according to the actual tower conditions & space availability
2.4.4- Go to Summary page & enter antenna heights which you think it will have clear LOS according to your path survey (mirror test or any other physical check) as shown in fig. 2.4.3
2.4.5- Go to Print Profile page from Module menu or by pressing ctrl P to confirm that link Fresnel zone has clear LOS above obstacles as shown in Fig. 2.4.5
2.4.6- If antennas heights which you entered still low to get clear LOS. Increase antenna height again according to available tower height till you get clear LOS with enough margin above obstacles
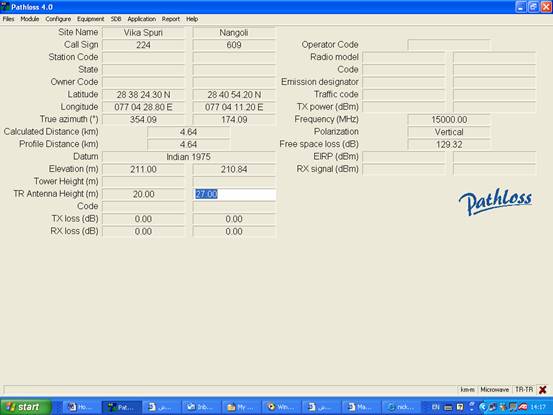
Fig. 2.4.3
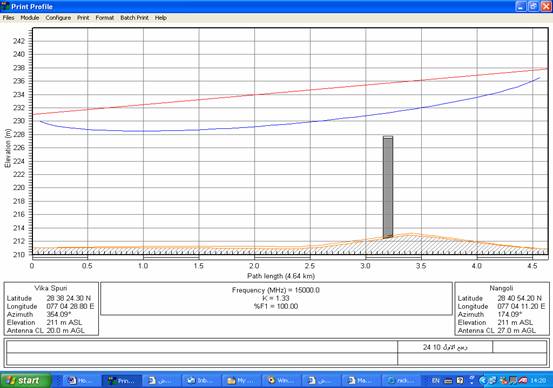
Fig. 2.4.5
|